You signed in with another tab or window. Reload to refresh your session.You signed out in another tab or window. Reload to refresh your session.You switched accounts on another tab or window. Reload to refresh your session.Dismiss alert
Copy file name to clipboardExpand all lines: src/pages/tutorials/agent/how-to-setup-agents-to-run-tests-on-local-mobile-devices.md
+2-2Lines changed: 2 additions & 2 deletions
Display the source diff
Display the rich diff
Original file line number
Diff line number
Diff line change
@@ -39,7 +39,7 @@ contextual_links:
39
39
40
40
In order to create an account, navigate to [https://testsigma.com/signup](https://testsigma.com/signup)
41
41
42
-

42
+

43
43
44
44
After successful sign up, you will receive a confirmation email. Make sure to confirm so your account will be activated before you begin.
45
45
@@ -83,7 +83,7 @@ Once your Testsigma agent is up and running and shows the STARTED status, click
83
83
84
84
**Agents > Add a new Agent**
85
85
86
-

86
+

87
87
88
88
Enter a title/name for your machine and click on the Save button.
The next section explains how you can add steps to test a sample scenario.
100
100
**Sample Test Scenario:** We will be using a sample login test scenario using the wordpress app where the user taps on login, enters an email ID and is sent a magic login link.
@@ -119,11 +119,11 @@ The Testsigma test recorder (web and mobile) is in-built and sits directly on yo
119
119
120
120
Step1: To do this, simply click the **Record** option at the top of the test case details page.
You’ll notice 3 options appear on top in the same pane:
174
174
- Tap
@@ -179,21 +179,21 @@ You’ll notice 3 options appear on top in the same pane:
179
179
So in this case click on tap and the recorder will perform a tap action in the app. Simultaneously this will generate an NLP statement in your test steps on the left hand side.
To do this in inspector mode, first click on the email field. Then from the actions choose the enter data option. A box will pop up where you’ll be able to enter the email you want to.
191
191
192
192
Like the previous step the same actions will be recorded as an NLP step.
193
193
194
194
If you want to **clear** the value entered, clicking on the clear option after selecting that element in inspector mode will do that for you. And once again since we’re recording the test it will be converted into a test step in NLP.
@@ -209,11 +209,11 @@ After performing these basic actions we need to verify that they were successful
209
209
210
210
So first click on the empty test step below the most recently created one in the recorder. From the drop down list select **‘Verify that the current page displays OPEN MAIL’**
@@ -228,23 +228,23 @@ In this section you will learn:
228
228
1. How to add steps and create a new element on the go
229
229
Learn more about how to add steps manually from the test case details page [here](https://testsigma.com/docs/test-cases/create-steps-recorder/android-apps/add-steps-manually/).
Choose the device you wish to run your tests on, the device configurations, or how you’d like the screenshots captured, etc. You can choose these options based on your preference.
259
259
@@ -267,13 +267,13 @@ After running the test case you’ll be able to view the results of your test ru
267
267
268
268
You can also view screenshots of each test step execution as well as watch a video of the entire test run.
Here all the test steps have passed successfully. In case if a test step fails you’ll be able to see the error message provided by clicking on the test step along with the screenshot. You can also check the video recording to see what went wrong in detail.
In this particular case we fixed the error by increasing the wait time of the assertion to ensure the app screen loaded completely before checking for the presence of the text.
The next section explains how you can add steps to test a sample scenario.
@@ -117,11 +118,11 @@ The Testsigma test recorder (web and mobile) is in-built and sits directly on yo
117
118
118
119
Step1: To do this, simply click the **Record** option at the top of the test case details page.
119
120
120
-

121
+

121
122
122
123
Step 2: A new window will appear that has a few options in rows.
123
124
124
-

125
+
125
126
126
127
Let’s break down each row.
127
128
@@ -149,7 +150,7 @@ To familiarize with Testsigma, you may choose any application that is already av
149
150
150
151
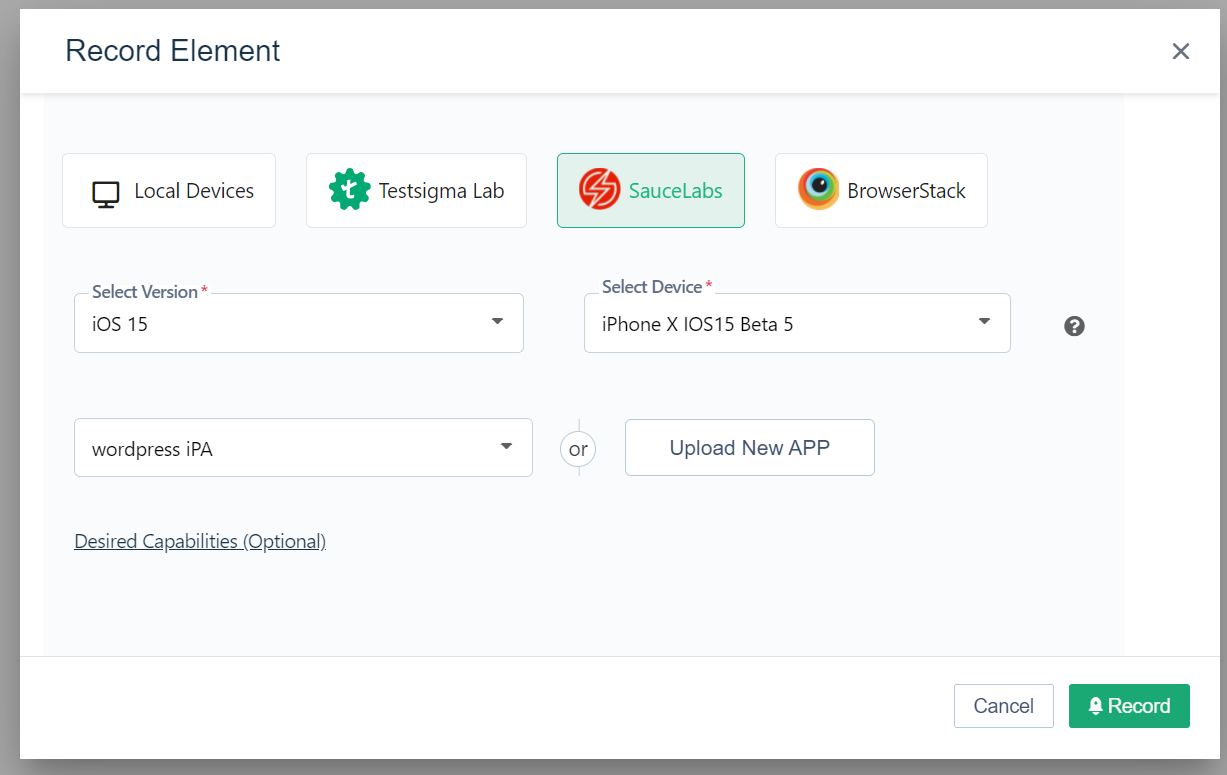
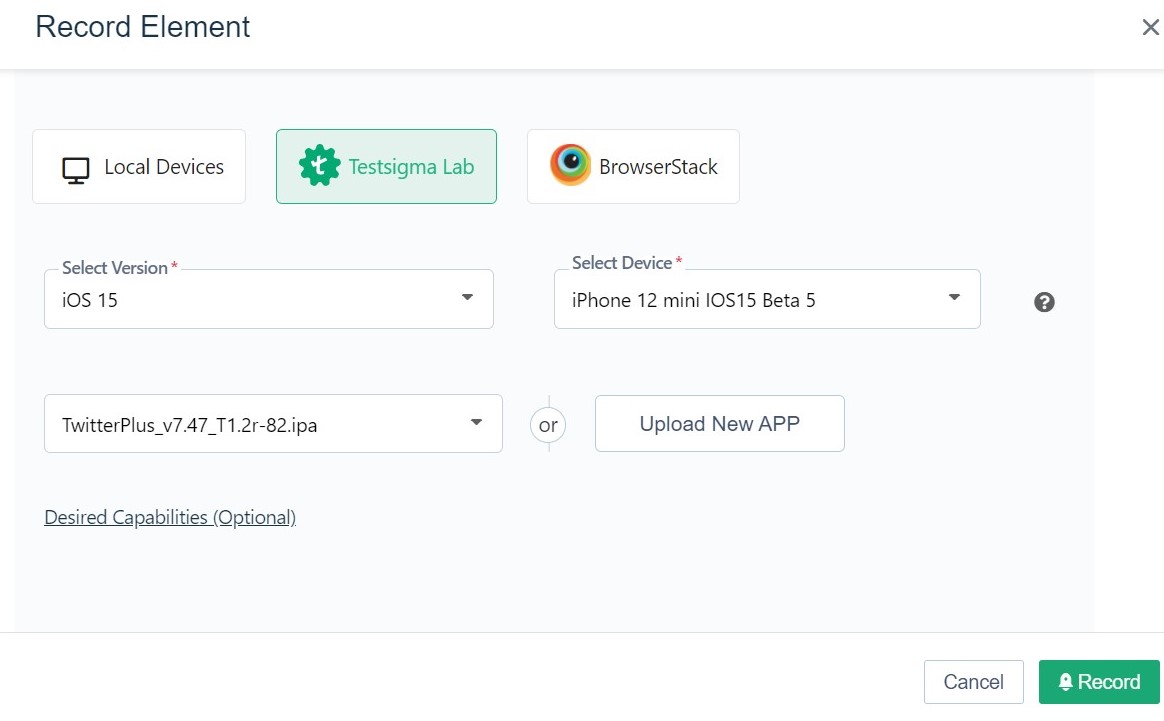
For this, the Twitter app’s ipa file needs to be uploaded as discussed earlier. Click on **Upload**. Wait for the app to be uploaded.
151
152
152
-

153
+
153
154
154
155
Once done, click **Record**. Upon clicking **Record**, the Testsigma Mobile Recorder will be launched.
155
156
@@ -159,7 +160,7 @@ New to Testsigma Mobile Recorder? [Here](https://testsigma.com/tutorials/test-ca
159
160
160
161
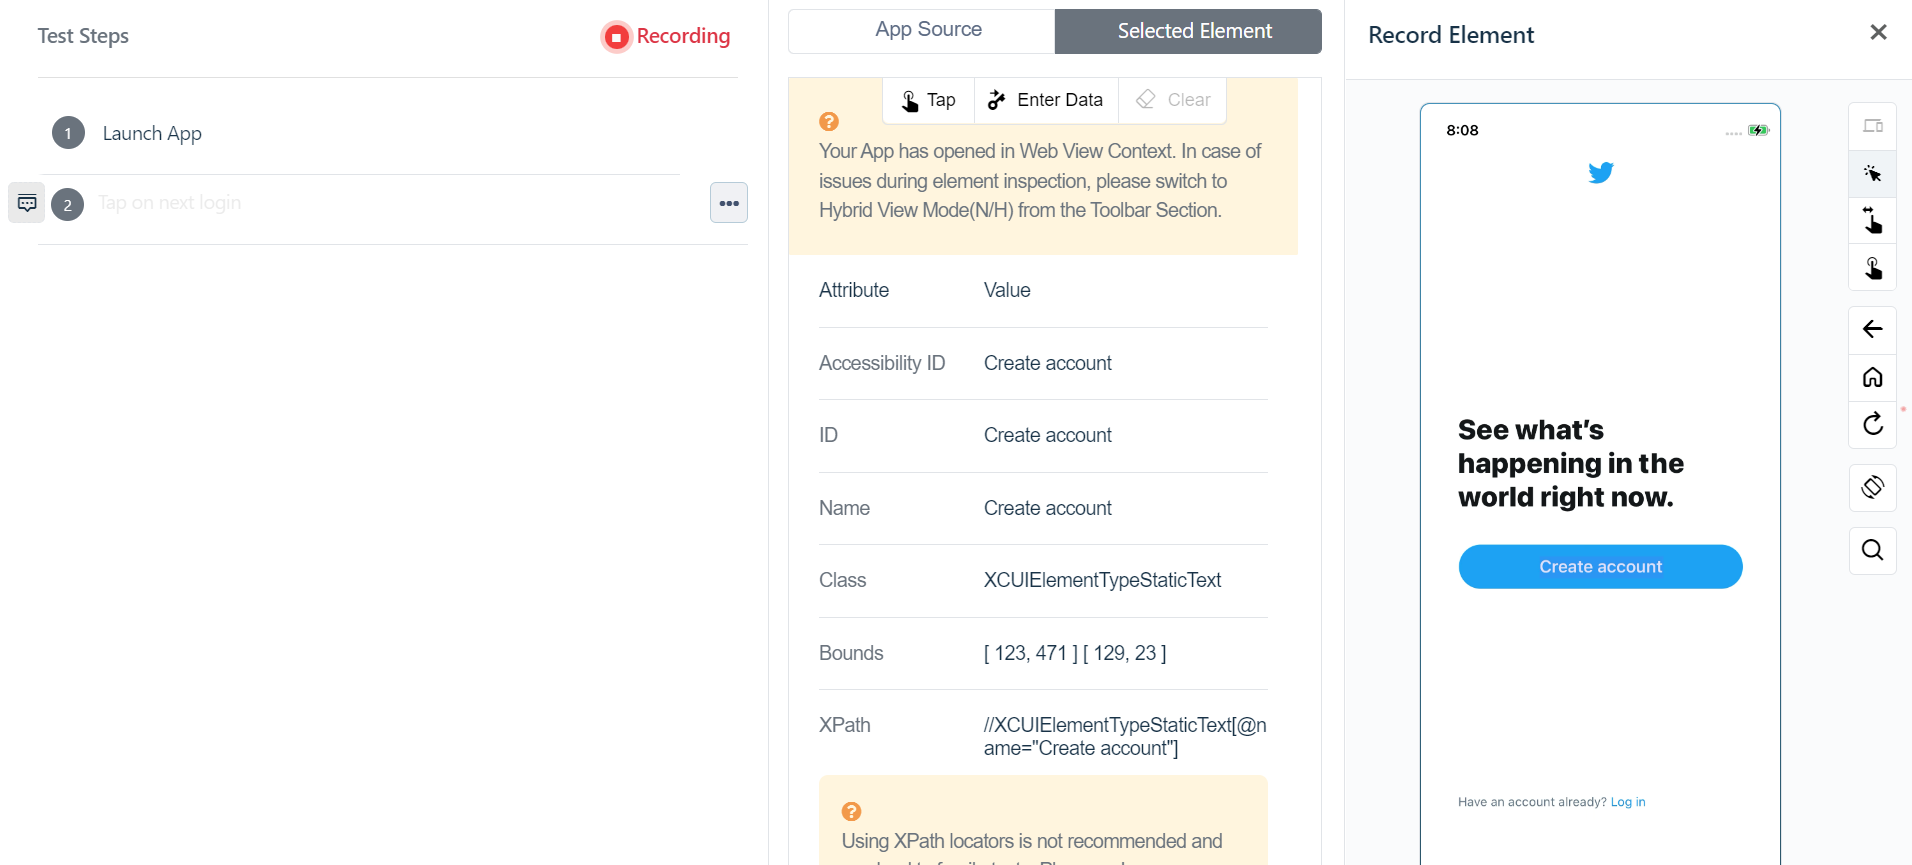
By default, the recorder will be in inspection mode (highlighted in yellow when you hover over any element).
161
162
162
-

163
+
163
164
164
165
Let’s try interacting with the Twitter app we just uploaded.
165
166
@@ -169,15 +170,15 @@ To tap on _“Create Account”_ that is displayed on the Twitter app screen, cl
169
170
170
171
You’d see a new pane appear in the centre.
171
172
172
-

173
+
173
174
174
175
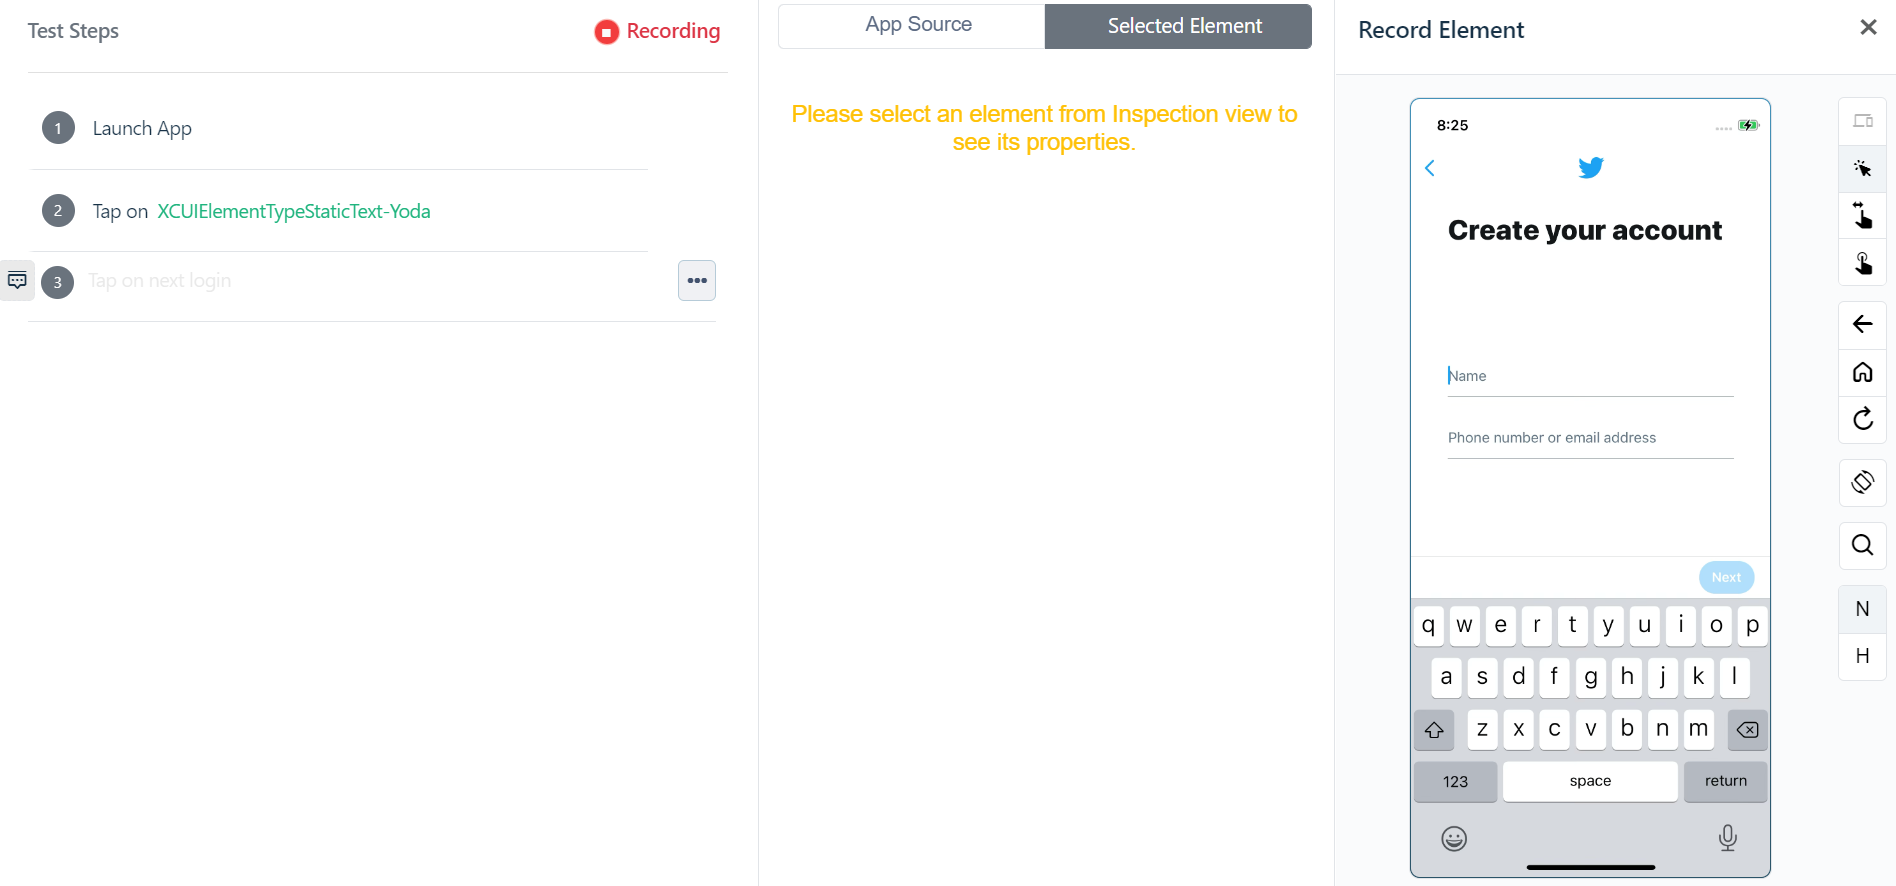
At the top, you will find these options : **Tap, Enter Data and Clear.**
175
176
176
177
Click on **Tap.**
177
178
178
179
This will perform a click/tap action and will take you to the next screen on the Twitter app. Consecutively, you will notice that this will also generate a test step in natural language automatically.
179
180
180
-

181
+
181
182
182
183
**Test Step 2.** Enter some data
183
184
@@ -189,7 +190,7 @@ Choose **Enter Data** from the actions at the top of the centre pane.
189
190
190
191
Now all you need to do is type in the Name (here, _John Doe_) you wish to enter in the **Enter data** form that appears.
191
192
192
-

193
+
193
194
194
195
**Test Step 3.** Clear data
195
196
@@ -220,12 +221,12 @@ Since we are verifying a text, choose the **“Verify that the current page disp
220
221
221
222
You only need to replace the test data part with the actual text you copied, let’s say, _“Customize your experience”_ from the inspector.
222
223
223
-

224
+
224
225
225
226
Paste this in place of “test data”. Click **Create** and you are done!
226
227
227
228
Here’s a summary of the steps we discussed so far.
To learn all other options available in the test recorder [click here](https://testsignma.com/docs/test-cases/create-steps-recorder/ios-apps/overview/).
231
232
@@ -241,12 +242,12 @@ In this section you will learn:
241
242
1. How to add steps and create a new element on the go
242
243
Learn more about how to add steps manually from the test case details page [here](https://testsigma.com/docs/test-cases/create-steps-nl/ios-apps/add-steps-manually/).
243
244
244
-

245
+

245
246
246
247
2. How to add steps using existing elements
247
248
You can reuse them at any time by choosing the element you want to use/reuse in the Test Case. Simply pick the name of the Element.
248
249
249
-

250
+

250
251
251
252
3. How to add a simple verification steps
252
253
Use the Verify action as used in Test Step 5 in the previous section.
@@ -268,14 +269,14 @@ Click **Run Now**.
268
269
269
270
Here’s a video that shows you a sample test run done for the test case we created
0 commit comments