You signed in with another tab or window. Reload to refresh your session.You signed out in another tab or window. Reload to refresh your session.You switched accounts on another tab or window. Reload to refresh your session.Dismiss alert
Copy file name to clipboardExpand all lines: README.md
+29-28Lines changed: 29 additions & 28 deletions
Display the source diff
Display the rich diff
Original file line number
Diff line number
Diff line change
@@ -1,13 +1,13 @@
1
1
# Getting Started with the Outlook Mail API and Python #
2
2
3
-
The purpose of this guide is to walk through the process of creating a simple Python web app that retrieves messages in Office 365. The source code in this repository is what you should end up with if you follow the steps outlined here.
3
+
The purpose of this guide is to walk through the process of creating a simple Python web app that retrieves messages in Office 365 or Outlook.com. The source code in this repository is what you should end up with if you follow the steps outlined here.
4
4
5
5
## Before you begin ##
6
6
7
7
This guide assumes:
8
8
9
9
- That you already have [Python](https://www.python.org/) and [Django](https://www.djangoproject.com/) installed and working on your development machine. This sample was created using Python version 3.4.2 and Django 1.7.1.
10
-
- That you have an Office 365 tenant, with access to an account in that tenant.
10
+
- That you have an Office 365 tenant, with access to an account in that tenant**OR** an Outlook.com developer preview account.
11
11
12
12
## Create the app ##
13
13
@@ -19,7 +19,7 @@ This creates a new subdirectory called `python_tutorial`. Change your command pr
19
19
20
20
python manage.py runserver
21
21
22
-
Once the server starts, open a web browser and browse to http://127.0.0.1:8000/. You should see a success message.
22
+
Once the server starts, open a web browser and browse to http://localhost:8000/. You should see a success message.
@@ -82,11 +82,11 @@ If you're familiar with Django development, this isn't anything new for you. If
82
82
83
83
The entries in the `.\tutorial\urls.py` file tell Django to send requests to either `/tutorial` or `/tutorial/home` to the `home` view. Finally, the `home` function in `.\tutorial\views.py` returns a simple HTTP response.
84
84
85
-
If you save all of your changes and navigate to http://127.0.0.1:8000 you should see "Welcome to the tutorial." Now that we've confirmed that the app is working, we're ready to do some real work.
85
+
If you save all of your changes and navigate to http://localhost:8000 you should see "Welcome to the tutorial." Now that we've confirmed that the app is working, we're ready to do some real work.
86
86
87
87
## Designing the app ##
88
88
89
-
Our app will be very simple. When a user visits the site, they will see a link to log in and view their email. Clicking that link will take them to the Azure login page where they can login with their Office 365 account and grant access to our app. Finally, they will be redirected back to our app, which will display a list of the most recent email in the user's inbox.
89
+
Our app will be very simple. When a user visits the site, they will see a link to log in and view their email. Clicking that link will take them to the Azure login page where they can login with their Office 365 or Outlook.com account and grant access to our app. Finally, they will be redirected back to our app, which will display a list of the most recent email in the user's inbox.
90
90
91
91
Let's begin by replacing the static message with a signon link. To do that, we'll modify the `home` function in `.\tutorial\views.py`. Update the `home` function to match the following.
92
92
@@ -111,25 +111,28 @@ Now the library is installed and ready to use. Create a new file in the `tutoria
111
111
from urllib.parse import quote, urlencode
112
112
113
113
# Client ID and secret
114
-
client_id = 'YOUR CLIENT ID'
115
-
client_secret = 'YOUR CLIENT SECRET'
114
+
client_id = 'YOUR APP ID HERE'
115
+
client_secret = 'YOUR APP PASSWORD HERE'
116
116
117
117
# Constant strings for OAuth2 flow
118
118
# The OAuth authority
119
119
authority = 'https://login.microsoftonline.com'
120
120
121
121
# The authorize URL that initiates the OAuth2 client credential flow for admin consent
@@ -140,25 +143,21 @@ The first thing we do here is define our client ID and secret. The values of `cl
140
143
141
144
### Generate a client ID and secret ###
142
145
143
-
Head over to https://dev.outlook.com/appregistration to quickly get a client ID and secret. Use the following details to register.
146
+
Head over to https://apps.dev.microsoft.com to quickly get a client ID and secret. Using the sign in buttons, sign in with either your Microsoft account (Outlook.com), or your work or school account (Office 365).
144
147
145
-
In Step 2:
148
+

146
149
147
-
-**App Name:** python-tutorial
148
-
-**App Type:** Server-side Web app
149
-
-**Redirect URI:**http://127.0.0.1:8000
150
-
-**Home Page URL:**http://127.0.0.1:8000
151
-
-**Secret Valid For:** 1 year
150
+
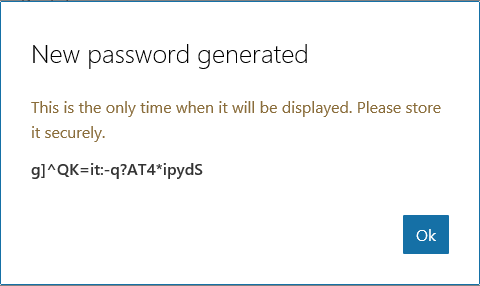
Once you're signed in, click the **Add an app** button. Enter `python-tutorial` for the name and click **Create application**. After the app is created, locate the **Application Secrets** section, and click the **Generate New Password** button. Copy the password now and save it to a safe place. Once you've copied the password, click **Ok**.
152
151
153
-
Be sure to replace `http://127.0.0.1:8000` with your correct web server address if you are using a different server.
152
+
154
153
155
-

154
+
Locate the **Platforms** section, and click **Add Platform**. Choose **Web**, then enter `http://localhost:8000/tutorial/gettoken/` under **Redirect URIs**. Click **Save** to complete the registration. Copy the **Application Id** and save it along with the password you copied earlier. We'll need those values soon.
156
155
157
-
In Step 3, select `Read mail`. If you plan on going beyond this tutorial and trying Calendar or Contacts API, go ahead and select additional permissions as well. For the purposes of this tutorial though, only `Read mail` is required.
156
+
Here's what the details of your app registration should look like when you are done.
158
157
159
-

After clicking the **Register App** button, copy your client ID and secret from the tool. Replace the `YOUR CLIENT ID` and `YOUR CLIENT SECRET` placeholders in the `.\tutorial\authhelper.py` file with these values and save your changes.
160
+
Replace the `YOUR APP ID HERE` and `YOUR APP PASSWORD HERE` placeholders in the `.\tutorial\authhelper.py` file with the values you generated and save your changes.
162
161
163
162
### Back to coding ###
164
163
@@ -196,11 +195,11 @@ The view doesn't do much now, but we'll change that soon. Add this new view to t
The `<SOME GUID>` portion should match your client ID. Click on the link and (assuming you are not already signed in to Office 365 in your browser), you should be presented with a sign in page. Sign in with your Office 365 account. Your browser should redirect to back to the `gettoken` view. The view doesn't do anything yet, so let's fix that now.
202
+
The `<SOME GUID>` portion should match your client ID. Click on the link and you should be presented with a sign in page. Sign in with your Office 365 or Outlook.com account. Your browser should redirect to back to the `gettoken` view. The view doesn't do anything yet, so let's fix that now.
204
203
205
204
### Exchanging the code for a token ###
206
205
@@ -227,7 +226,7 @@ Now add another helper function to `authhelper.py` called `get_token_from_code`.
227
226
post_data = { 'grant_type': 'authorization_code',
228
227
'code': auth_code,
229
228
'redirect_uri': redirect_uri,
230
-
'resource': 'https://outlook.office365.com',
229
+
'scope': ' '.join(str(i) for i in scopes),
231
230
'client_id': client_id,
232
231
'client_secret': client_secret
233
232
}
@@ -255,9 +254,9 @@ Let's make sure that works. Modify the `gettoken` function in `views.py` to use
If you save your changes, restart the server, and go through the sign-in process again, you should now see a long string of seemingly nonsensical characters. If everything's gone according to plan, that should be an access token. Copy the entire value and head over to http://jwt.calebb.net/. If you paste that value in, you should see a JSON representation of an access token. For details and alternative parsers, see [Validating your Office 365 Access Token](https://github.com/jasonjoh/office365-azure-guides/blob/master/ValidatingYourToken.md).
257
+
If you save your changes, restart the server, and go through the sign-in process again, you should now see a long string of seemingly nonsensical characters. If everything's gone according to plan, that should be an access token.
259
258
260
-
Once you're convinced that the token is what it should be, we're ready to call the Mail API.
259
+
Now we're ready to call the Mail API.
261
260
262
261
## Using the Mail API ##
263
262
@@ -311,6 +310,8 @@ Create a new file in the `tutorial` directory called `outlookservice.py`. We'll
0 commit comments